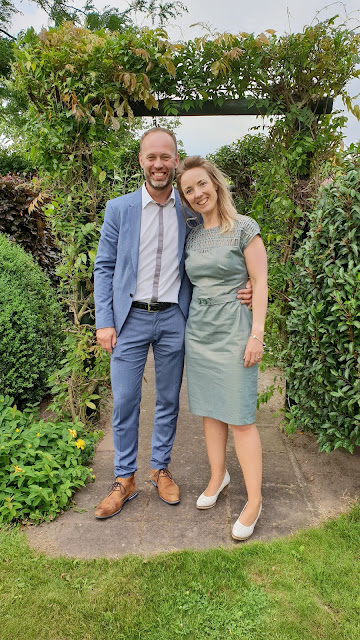
 I love quick little projects with fast results, but I can also really get my teeth into somewhat bigger and more complicated projects. Like this dress! This dress has been allowed to camp on my mannequin for a few months. From only strips of fabric to a real dress, made for a special occasion. And during this process I've tried some new techniques and learned a lot! Again.
Slow sewing
In March of this year I already started testing the weave. I first made bias strips of unbleached cotton (15 mm wide) and tried out how I could fixate the strips the best. I also requested the help of my followers on Instagram and Facebook. I myself tried it with textile glue and got the suggestion to use the ironing-band and Vliesofix.
With a biasband maker (smallest size) and the iron I fixed the strips. Vliesofix will release if you do not stitch it (I didn't want to stitch it) and the band was too laborious, so I choose textile glue. In retrospect the best choice because the final fabric was not easy to iron (without damaging the shiny layer of the fabric). The trick was not to iron it too hot on the inside with a piece of baking paper on it and then glue it. Learning by doing!
Weave pattern
First a weave test with unbleached cotton.
I 'draped' the strips of cotton over the mannequin in different patterns. I wanted a pattern that was light enough but not too open. Semi See Trough!
It had to be like that, with a kind of heart-shaped transition to the rest of the dress. But which pattern to use? The image I had in mind was a fitted dress with pencil skirt and a split at the back and I chose a dress, which was in Knipmode in that month, as a basis.
 |
| Jurk 106, Knipmode maart 2018 (appendix) |
I made the neckline higher and the pattern parts of the front of the top I stuck together, as far as I could. I drew the heart-shaped transition myself with some examples of Pinterest. For the weave part the pattern looked like this:
On the checkered paper I outlined how the strips of fabric went horizontally. Vertically there was one strip of fabric in each row of boxes.
On the ironing board I fixed the strips with a pin and then attached them at each 'crossroads' with a drop of textile glue. A fun and very time-consuming job. Then and there I decided to make only the front of the dress in this way and not the back. Slow enough.
Little trick
In order to keep the strips in place on the side I stitched with thread tension zero and stitch size 5 (largest stitch) right along the edge on the pattern paper. After that I tore away the pattern paper for the most part.
I stitched the the weave part and the rest of the dress together. That actually went surprisingly well. I thought I had to topstitch it, but that was not necessary at all.
The rest of the construction of the dress was quite simple. Well, if you do not forget to stitch the loops for the belt. Silly me.
Challenge
The biggest challenge was the finishing of the weave part at the neck and the armholes. At the neck I worked with a small seam that I folded on the inside and stitched on the right side. At the armholes I have folded a seam on the rightside and stitched it. This method was actually the best. Oh well. I did the stitching in both cases with a twin needle.
Lining
I stitched the lining at the heart-shaped transition and at the back at the neck and along the zipper. The armholes and the shoulder seams I stitched by hand.
Belt
The belt I pimped in the style of the weave with bias strips. I fixed these on one side with textile glue before stitching. After stitching and turning I topstitched the belt and made buttonholes (I did it!) and attached buttons.
Final fitting
The fabric lent itself well to making the bias strips. And it had been ideal for a jacket. I actually bought the fabric for that. It was less suitable for the type of dress that I made, especially because of the metallic shine that is over it. Every crease you see and it is difficult to iron. So in the week before the wedding, that's why I made this dress, I was not completely satisfied with the fit. Time to call in the cavalry. My mom with her golden hands. Just like before, me standing absolutely still and my mother took care of the right fit. Brings back memories. And then it was finally finished and I could wear it! This festive lattice dress!


Ik doe mijn hoedje af. Knap zeg
BeantwoordenVerwijderendankje;-)
Verwijderen